Okay, as I told you guys in the previous post I'd be working on my e-wallpaper using paperdoll-like theme with Hari Raya as it main theme.
So let's start with the basic step. Googling for images.
 When I think of cute dolls, I thought of Vocaloid. So I googled for Vocaloid figurines on the web. Then for the Hari Raya theme, I searched for kids baju kurung and baju melayu (both are Malay traditional cloth wore on Hari Raya).
 Of course after finding all the images, now is the time to work on it.
01. Open the image that I want to use. Next, I duplicate the image layer. Then, I made a new layer in between both of the image layers and fill the layer with black colour.


The dark background is used so that when I extract the doll image, I can see all the flaws and rough edges clearly. Thus, it'd made the cleaning process afterwards much more easier.
02. I extract the image using Masking technique.

 After extracting it, I used the advantage of the dark background to help me erase all the rough and uneven edges.
 I zoomed the image to ease the erasing and smoothing process.
03. After all the hefty extracting works, I opened up a new image; baju melayu. Duplicated it and I use the Magic Wand Tool (because the background is simply plain white) and choose the background. Deleted the background and you got yourself a baju melayu.

04. To combine the baju melayu and doll, first, I pasted the baju melayu on top of the doll layer.
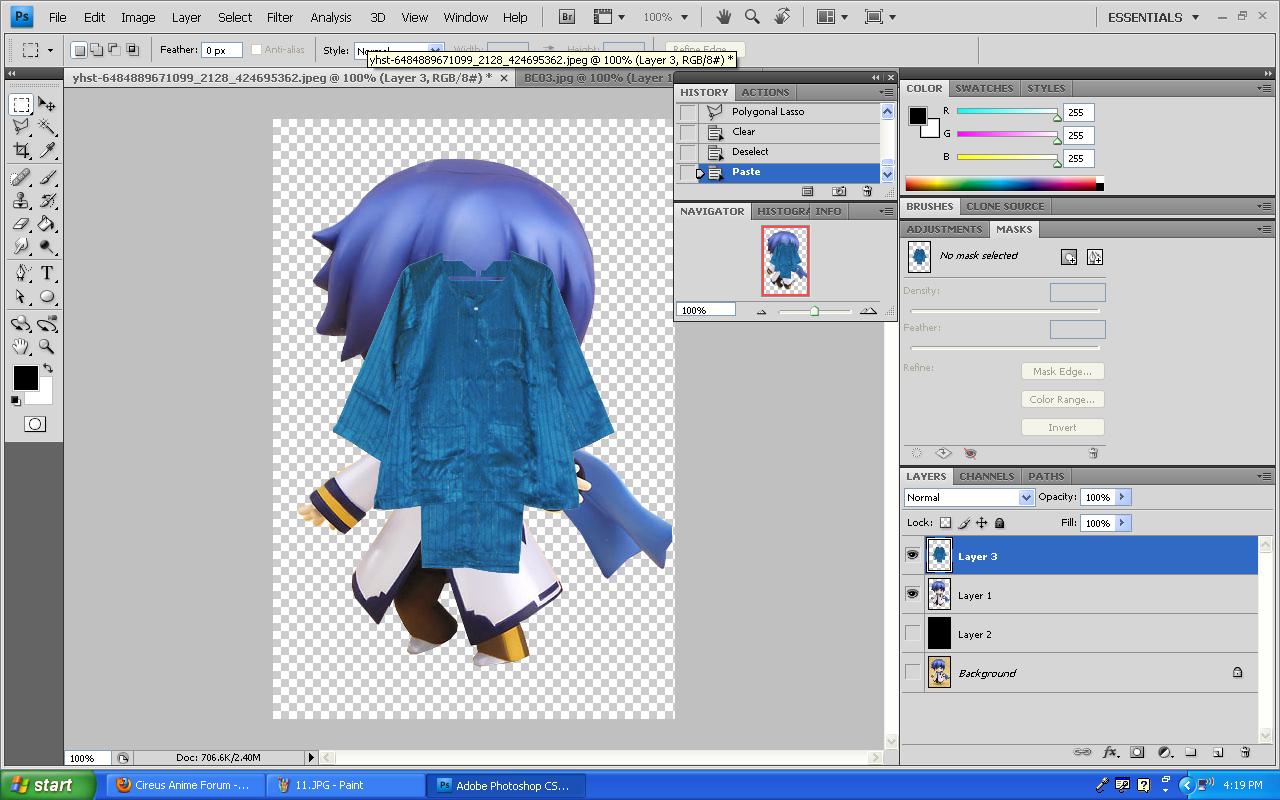 Then, I separated the sleeve parts of the baju melayu and the pants apart from the body of baju melayu using Polygonal Lasso Tool and pasting the differents parts of the baju melayu on different layers.


05. Here comes the tricky part. Blending the baju melayu with the body of the doll. What I do first is select the body part of the doll using the Polygonal Lasso Tool then filled it with any solid bright colour.


Okay, after that, make sure that the baju melayu body layer is on top of the coloured body of the doll layer. Then, select the coloured body of the doll layer by left clicking on the image of the layer then choose the layer of baju melayu body click Ctrl + Shift + I and delete it.
 There you got it!
06. Repeat the process for the sleeves and the pants. Notice that I deleted the doll's scarf and added a songkok on the doll's head.


07. To make the songkok appear more realistic, duplicate the songkok layer and right click on the duplicated layer. Then click on Layer Style, ticked the Drop Shadow box and click ok. Adjust the shadow by erasing it and playing with the opacity.
 08. I repeated the process for the female doll.
 .endpartone


No comments:
Post a Comment